


Currently, git is the most popular version control system used globally. More than 90% of the worlds software projects use git!
As of January 2020, GitHub reports having over 40 million users and more than 190 million repositories (including at least 28 million public repositories). Git is a free and open source distributed version control system designed to handle everything from small to very large projects with speed and efficiency.
Essentially, git records the changes made to our code over time and records those changes in a repository. Git enables developers to look at the project history and clearly see who has made changes to the code, why those changes were made, and when the changes happened.
The great thing about git is, if something gets broken during development, you can easily revert back to an earlier state of your repository. This article is not going to cover how git works or how you can install it, there are plenty of good resources available to show you this.
This article is to show you how to set up a git repository quickly on your local machine, and hook it up to github . The commands shown are for OSX, but should be similar on windows using a Bash Shell like Git Bash ...
I use Homebrew to install git on my Mac, if you are using a different operating system, check the Getting Started - Installing Git page here ...
Open up your terminal in OSX and type the following command and enter to install Homebrew on your system you may have to do this using sudo:
pedbad$ /bin/bash -c "$(curl -fsSL https://raw.githubusercontent.com/Homebrew/install/HEAD/install.sh)"
After installing homebrew, check the installation by running the brew --version command in terminal:
pedbad$ brew --version
Homebrew 3.2.16
next run the brew install git command, after installation check that git has installed by running --version again, you should see something like this:
pedbad$ brew install git
......

pedbad$ git --version
git version 2.33.1
The first time you use git you have to set up a few configuration settings, to specify your name, email, default editor (I will use VScode) and how git should handle line endings. With Git, these configurations can be set up to have different settings for different repositories or projects
- System level - All users
- Global level - All repositories of the current user
- Local level - Only the repository in the current directory
Typically, on your own machine, you want to set the --global settings, so in terminal type the following commands, make sure your name is contained in double quotes, as there is a space!
pedbad$ git config --global user.name "Pedram Badakhchani"
pedbad$ git config --global user.email pedbad@somehere.cm
pedbad$ git config --global core.editor "code --wait"
All these configurations are stored in a text file and you can always view and change them anytime..
pedbad$ git config --global -e
NOTE: On windows end of lines are indicated with carriage returns and line feeds, this is different to Linux and OSX machines, so it is important to set git to handle end of lines properly to avoid issues caused by users with different operating systems!
To prevent headaches later on, always configure a property called core.autocrlf , crlf is short for carriage return line feed. So as I am using a mac, this property needs to be set to input:
pedbad$ git config --global core.autocrlf input
NOTE: On windows set this property to true, instead of input
For the purpose of this demo, I will create a folder on my desktop called CM1040-test
pedbad$ git config --global core.autocrlf input
pedbad$ cd Desktop pedbad$ mkdir CM1040-test && cd CM1040-test pedbad$ pwd /Users/ped/Desktop/CM1040-test
Now I am in the CM1040-test folder, I will first check my git version, then initialise a git repository inside this folder:
pedbad$ git --version
git version 2.33.1
after initialising the git repository you should see something like this:
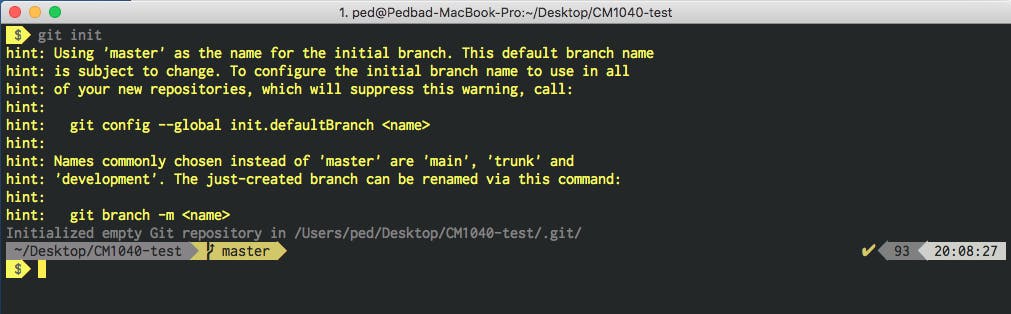
NOTE: Recently, all new source code repositories created on GitHub were renamed "main" instead of "master" as part of the company's effort to remove unnecessary references to slavery and replace them with more inclusive terms. You can read more about it here....
So as git hint recommends
hint: Using 'master' as the name for the initial branch. This default branch name hint: is subject to change. To configure the initial branch name to use in all hint: of your new repositories, which will suppress this warning, call: hint: hint: git config --global init.defaultBranch
run the following command in terminal:
pedbad$ git config --global init.defaultBranch main

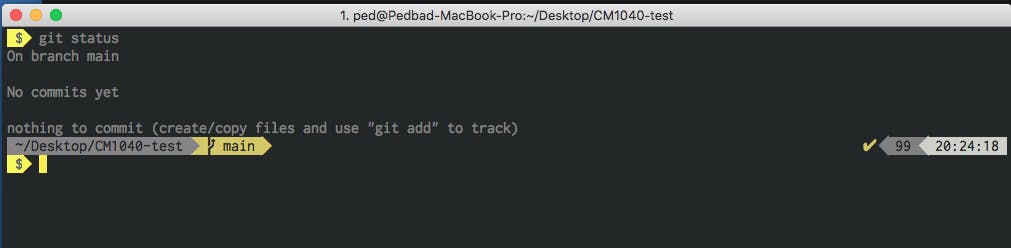
now run the command git status
pedbad$ git status
you should see something like this, git telling you which branch you are on and if there are any commits necessary...:
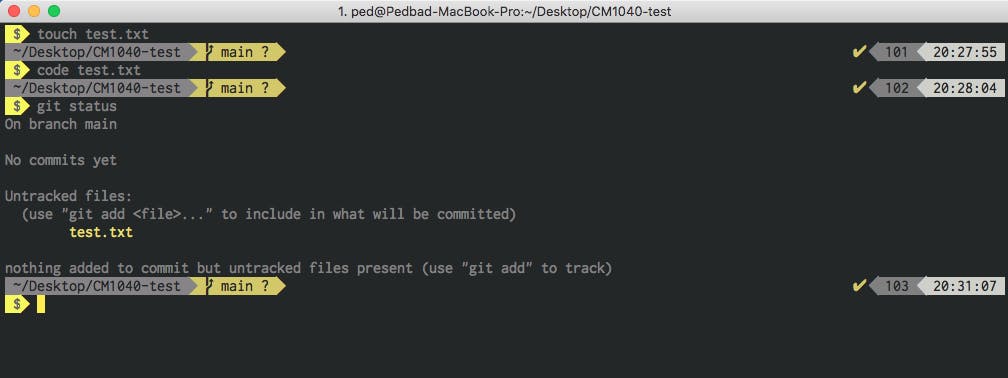
For now, I will create a simple text file in my CM1040-test folder and edit it with some text for demonstration, in real life, this is where you will be adding your project files and resources...
pedbad$ touch test.txt
after the file is created check the git status again, you will see:
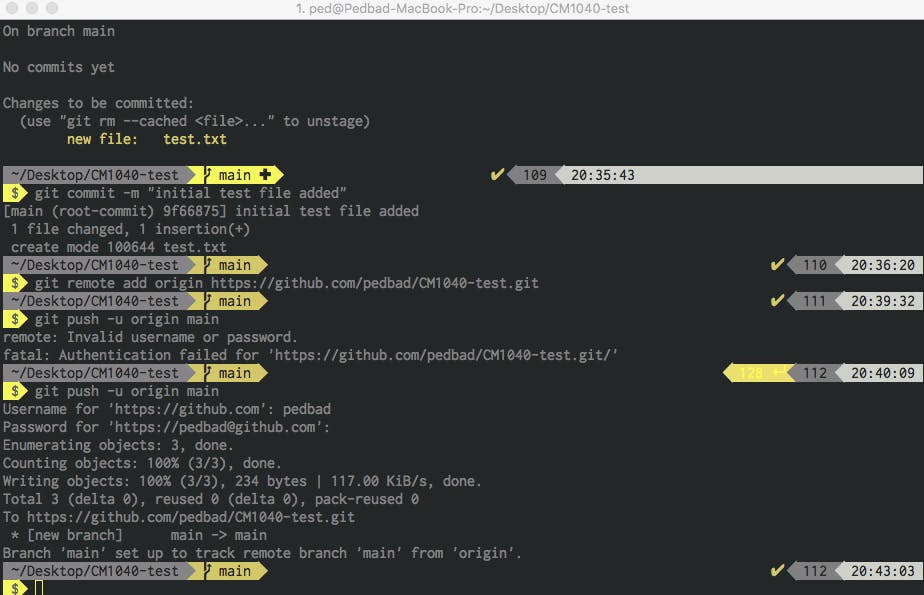
before we can push this file to our repository we will need to add it and then commit it...
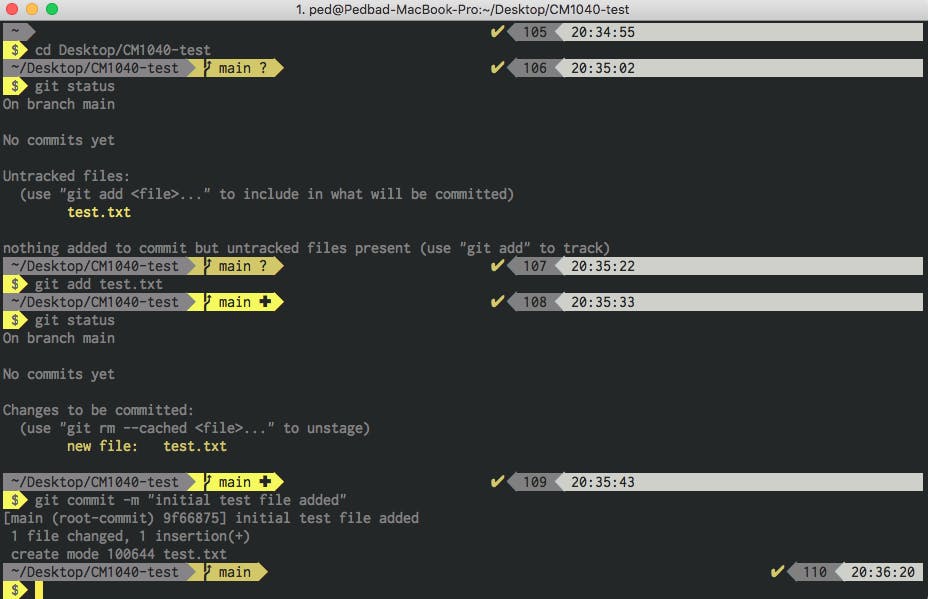 (to do......)
How to Configure your macOs Terminal with Zsh like a Pro