


step by step guide to install Django3 on OSX
Here is my step by step guide for installing Django3 on my old Mac - running macOS HighSierra 10.13.6. The installation process should be roughly the same if your are using a different Operating System, like Windows or Linux. Django is an open-source python web framework, and hopefully the ubiquity of Python should make it easy for you to follow these instructions on whichever operating system you are using.
So to begin, you will beed to have Python installed on your machine. On OSX, you can check which version of python you have by typing the following in Terminal on Mac :
$ python --version
Python 2.7.16
$ python3 --version
Python 3.9.4
$
//you can also just use:
$ python3 -V
Python 3.9.4
Step 1 — Installing Python 3
- Choose the version you want to install from python.org
Note, the Follow-along coding lab, for the Advanced Web Development module on Coursera , currently uses the following python versions, so if you want to keep your local install identical to the labs, use Python 3.6.9
root@f3fe00bac39b:/home/coder/project# python -V
Python 2.7.17
root@f3fe00bac39b:/home/coder/project# python3 -V
Python 3.6.9
root@f3fe00bac39b:/home/coder/project#
I will be using the latest version, which at the time of writing, is Python 3.9.4
. Step 2 — Install, Create and activate your virtual environment
After installing python, it is best practice to create a virtual environment to make sure all your project dependencies are encapsulated in one place. So using a virtual environment to install Django is recommended. When you use a virtual environment, you create an isolated environment that doesn't pollute your global python installation.
I will be using a python package called pipenv . There are other packages which manage virtual environments and you may want to check them out too. However, I recommend pipenv as I find the pipfile it generates very useful (similar to the npm packages package.json) the pipfile generated by pipenv holds various metadata relevant to the project.
Also, I find pipenv to be the cleanest way to create and manage virtual environments. Also when you are ready to deploy your project or even push it to your GitHub repository, you don't want your local environment related files being stored on GitHub or being uploaded to your live production server.
For me, using pipenv is the cleanest way of preparing my code to be shared or deployed, you simply use the pipfile generated to rebuild your project requirements on other systems .
The purpose of a virtual environment is to ensure that your project versions don't conflict with other projects you may have on your system. There are several ways to install virtual environments. pipenv is the one I recommend.
The main purpose of Python virtual environments is to create an isolated environment for your Python projects. This means that each project can have its own dependencies, regardless of what dependencies other project may have.
For the Advanced Web Development module examples, I will make a folder called Dev to store all my projects:
$ mkdir Dev && cd Dev
$ pwd
/Users/pedbad/Dev
and to mimic the labs, inside the Dev folder, I will make a new folder called advanced_web_dev
$ mkdir advanced_web_dev && cd advanced_web_dev
$ pwd
/Users/pedbad/Dev/advanced_web_dev
Now that I am inside the advanced_web_dev directory, I will install the pipenv packaging tool for Python, I will also install pip and upgrade it.
Note, that these two packages are installed Globally on my system. So now my Mac has global access to pipenv and also pip.
$ python3 -m pip install pipenv pip --upgrade

//you should see the two packages being installed:

Collecting pipenv
  Downloading pipenv-2020.11.15-py2.py3-none-any.whl (3.9 MB)
     |████████████████████████████████| 3.9 MB 2.9 MB/s
Collecting pip
  Using cached pip-21.0.1-py3-none-any.whl (1.5 MB)
....
....
....
To check, run the following commands:
$ pip -V
pip 21.0.1 from /Library/Frameworks/Python.framework/Versions/3.9/lib/python3.9/site-packages/pip (python 3.9)
To see which global packages you have installed run the following command:
$ pip freeze
appdirs==1.4.4
certifi==2020.12.5
distlib==0.3.1
filelock==3.0.12
pipenv==2020.11.15
six==1.15.0
virtualenv==20.4.3
virtualenv-clone==0.5.4
To uninstall a package, you can use
$ pip uninstall pipenv
and check with
$ pip freeze
appdirs==1.4.4
certifi==2020.12.5
distlib==0.3.1
filelock==3.0.12
six==1.15.0
virtualenv==20.4.3
virtualenv-clone==0.5.4
Note, !!! Do NOT uninstall pip !!! For more advanced users, you should check homebrew Package Manager
Just to confirm, run the command pipenv in terminal to see:
$ pip pipenv

  check      Checks for PyUp Safety security vulnerabilities and against PEP
             508 markers provided in Pipfile.

  clean      Uninstalls all packages not specified in Pipfile.lock.
  graph      Displays currently-installed dependency graph information.
  install    Installs provided packages and adds them to Pipfile, or (if no
             packages are given), installs all packages from Pipfile.

  lock       Generates Pipfile.lock.
  open       View a given module in your editor.
  run        Spawns a command installed into the virtualenv.
  scripts    Lists scripts in current environment config.
  shell      Spawns a shell within the virtualenv.
  sync       Installs all packages specified in Pipfile.lock.
  uninstall  Uninstalls a provided package and removes it from Pipfile.
  update     Runs lock, then sync.
Note, if you see command not found try
$ python3 -m pipenv
Next run the command to install your required version of python
advanced_web_dev $ pipenv install --python python3

//you should see
Creating a virtualenv for this project...
Pipfile: /Users/pedbad/Dev/advanced_web_dev/Pipfile
Using /Library/Frameworks/Python.framework/Versions/3.9/bin/python3.9 (3.9.4)to create virtualenv...
...

✔ Successfully created virtual environment!
Virtualenv location: /Users/pedbad/.local/share/virtualenvs/advanced_web_dev-IvnXoyte
Creating a Pipfile for this project...
Pipfile.lock not found, creating...
Locking [dev-packages] dependencies...
Locking [packages] dependencies...
Updated Pipfile.lock (16c839)!
Installing dependencies from Pipfile.lock (16c839)...
  🐍   ▉▉▉▉▉▉▉▉▉▉▉▉▉▉▉▉▉▉▉▉▉▉▉▉▉▉▉▉▉▉▉▉ 0/0 — 00:00:00
To activate this project's virtualenv, run pipenv shell.
Alternatively, run a command inside the virtualenv with pipenv run.
you should see inside the advanced_web_dev directory a pipfile is generated
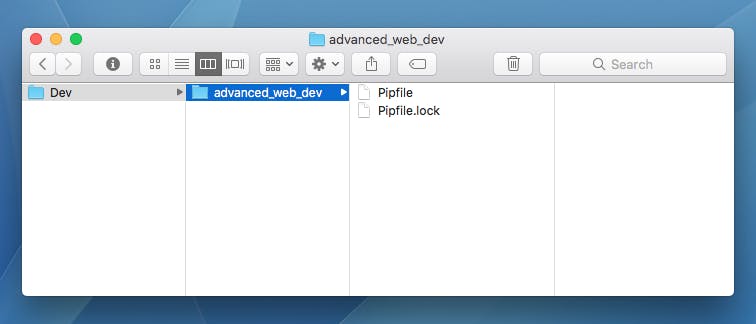
let's take a look at this Pipfile, this file contains details of our virtual environment
(advanced_web_dev) pedbad$ ls
Pipfile
(advanced_web_dev) pedbad$ cat Pipfile
[[source]]
url = "https://pypi.org/simple"
verify_ssl = true
name = "pypi"

[packages]

[dev-packages]

[requires]
python_version = "3.9"
(advanced_web_dev) pedbad$
Step 3 — Activating your virtual environment with pipenv
You use the pipenv shell command to activate a virtual environment, and the deactivate command to get out of your virtual environment. Make sure you are in the right directory /Dev/advanced_web_dev/ when you do this.
Notice how your prompt is now prefixed with the name of your environment, in this example (advanced_web_dev). This is the indicator that env is currently active,
Last login: Fri Apr 23 11:19:39 on ttys000
pedbad$ cd Dev
pedbad$ cd advanced_web_dev/
pedbad$ pipenv shell
Creating a virtualenv for this project...
Pipfile: /Users/pedbad/Dev/advanced_web_dev/Pipfile
Using /Library/Frameworks/Python.framework/Versions/3.9/bin/python3 (3.9.4) to create virtualenv...
⠴ Creating virtual environment...created virtual environment CPython3.9.4.final.0-64 in 968ms
  creator CPython3Posix(dest=/Users/pedbad/.local/share/virtualenvs/advanced_web_dev-IvnXoyte, clear=False, no_vcs_ignore=False, global=False)
  seeder FromAppData(download=False, pip=bundle, setuptools=bundle, wheel=bundle, via=copy, app_data_dir=/Users/pedbad/Library/Application Support/virtualenv)
    added seed packages: pip==21.0.1, setuptools==54.1.2, wheel==0.36.2
  activators BashActivator,CShellActivator,FishActivator,PowerShellActivator,PythonActivator,XonshActivator

✔ Successfully created virtual environment!
Virtualenv location: /Users/pedbad/.local/share/virtualenvs/advanced_web_dev-IvnXoyte
Creating a Pipfile for this project...
Launching subshell in virtual environment...
pedbad$  . /Users/pedbad/.local/share/virtualenvs/advanced_web_dev-IvnXoyte/bin/activate
(advanced_web_dev) pedbad$
and later to deactivate
(advanced_web_dev) pedbad$ deactivate
pedbad$
Step 4 — Installing packages with pipenv instead of pip
You can run pip install commands to install packages in your virtual environment, but always remember to use the pipenv command to install your packages, so both the virtual environment and the Pipfile are updated. If you just use pip, a new Pipfile is not generated, and you don't see the installed library in the Pipfile [packages]
So Don't do this, see below, when we use pip install requests and then look at the Pipfile:
(advanced_web_dev) pedbad$ pip install requests
Collecting requests
  Downloading requests-2.25.1-py2.py3-none-any.whl (61 kB)
     |████████████████████████████████| 61 kB 2.6 MB/s
Collecting idna<3,>=2.5
  Downloading idna-2.10-py2.py3-none-any.whl (58 kB)
     |████████████████████████████████| 58 kB 5.1 MB/s
Collecting certifi>=2017.4.17
  Using cached certifi-2020.12.5-py2.py3-none-any.whl (147 kB)
Collecting chardet<5,>=3.0.2
  Downloading chardet-4.0.0-py2.py3-none-any.whl (178 kB)
     |████████████████████████████████| 178 kB 6.1 MB/s
Collecting urllib3<1.27,>=1.21.1
  Downloading urllib3-1.26.4-py2.py3-none-any.whl (153 kB)
     |████████████████████████████████| 153 kB 6.6 MB/s
Installing collected packages: urllib3, idna, chardet, certifi, requests
Successfully installed certifi-2020.12.5 chardet-4.0.0 idna-2.10 requests-2.25.1 urllib3-1.26.4
(advanced_web_dev) pedbad$ cat Pipfile
[[source]]
url = "https://pypi.org/simple"
verify_ssl = true
name = "pypi"

[packages]
                        // requests library is not here!

[dev-packages]

[requires]
python_version = "3.9"
(advanced_web_dev) pedbad$

//but if we do pip freeze we'll see

(advanced_web_dev) pedbad$ pip freeze
certifi==2020.12.5
chardet==4.0.0
idna==2.10
requests==2.25.1
urllib3==1.26.4
(advanced_web_dev) pedbad$
Always use pipenv to install your packages, this way the Pipfile is updated as well as your virtual environment.
(advanced_web_dev) pedbad$ pipenv install requests
Installing requests...
Adding requests to Pipfile's [packages]...
✔ Installation Succeeded
Pipfile.lock not found, creating...
Locking [dev-packages] dependencies...
Locking [packages] dependencies...
Building requirements...
Resolving dependencies...
✔ Success!
Updated Pipfile.lock (fe5a22)!
Installing dependencies from Pipfile.lock (fe5a22)...
  🐍   ▉▉▉▉▉▉▉▉▉▉▉▉▉▉▉▉▉▉▉▉▉▉▉▉▉▉▉▉▉▉▉▉ 0/0 — 00:00:00
(advanced_web_dev) pedbad$ cat Pipfile
[[source]]
url = "https://pypi.org/simple"
verify_ssl = true
name = "pypi"

[packages]
requests = "*"

[dev-packages]

[requires]
python_version = "3.9"
(advanced_web_dev) pedbad$
also remember to use pipenv to uninstall packages, so you always keep your Pipfile up to date
(advanced_web_dev) pedbad$ pipenv uninstall requests
Uninstalling requests...
Found existing installation: requests 2.25.1
Uninstalling requests-2.25.1:
  Successfully uninstalled requests-2.25.1

Removing requests from Pipfile...
Locking [dev-packages] dependencies...
Locking [packages] dependencies...
Updated Pipfile.lock (16c839)!
(advanced_web_dev) pedbad$

(advanced_web_dev) pedbad$ cat Pipfile
[[source]]
url = "https://pypi.org/simple"
verify_ssl = true
name = "pypi"

[packages]

[dev-packages]

[requires]
python_version = "3.9"
(advanced_web_dev) pedbad$
So now, lets install Django using pipenv
(advanced_web_dev) pedbad$ pipenv install django
Installing django...
Adding django to Pipfile's [packages]...
✔ Installation Succeeded
Pipfile.lock (16c839) out of date, updating to (06f36b)...
Locking [dev-packages] dependencies...
Locking [packages] dependencies...
Building requirements...
Resolving dependencies...
✔ Success!
Updated Pipfile.lock (06f36b)!
Installing dependencies from Pipfile.lock (06f36b)...
  🐍   ▉▉▉▉▉▉▉▉▉▉▉▉▉▉▉▉▉▉▉▉▉▉▉▉▉▉▉▉▉▉▉▉ 0/0 — 00:00:00
(advanced_web_dev) pedbad$ pip freeze
asgiref==3.3.4
Django==3.2
pytz==2021.1
sqlparse==0.4.1
(advanced_web_dev) pedbad$ pip freeze > requirements.txt
(advanced_web_dev) pedbad$ ls
Pipfile            Pipfile.lock        requirements.txt
(advanced_web_dev) pedbad$


(advanced_web_dev) pedbad$ cat requirements.txt
asgiref==3.3.4
Django==3.2
pytz==2021.1
sqlparse==0.4.1
(advanced_web_dev) pedbad$ cat Pipfile
[[source]]
url = "https://pypi.org/simple"
verify_ssl = true
name = "pypi"

[packages]
django = "*"

[dev-packages]

[requires]
python_version = "3.9"
(advanced_web_dev) pedbad$
now, if you want to upload your project to github or a remote server, all that is needed to rebuild the project are the Pipfile or the requirements.txt file, to build a project in a new python virtual environment you can just use:
(advanced_web_dev) pedbad$ pipenv install < requirements.txt